Key takeaways
- Hang the bottom of a dining room chandelier 30 to 36 inches above the tabletop on a standard eight foot ceiling.
- Add roughly three inches of clearance for every additional foot of ceiling height above eight feet, so a nine foot ceiling lands at 33 to 39 inches and a ten foot ceiling at 36 to 42 inches.
- Size the fixture to one half to two thirds the width of the table, not the width of the room.
- Centre the chandelier over the table, not over the room, whenever the two disagree.
- A long rectangular table usually wants a linear fixture or two matched pendants rather than one round chandelier.
The one measurement that decides whether the room looks right
Hang the bottom of a dining room chandelier 30 to 36 inches above the surface of the table. That single number does more for how a dining room feels than the style, the finish or the price of the fixture, and getting it wrong is the most common reason a genuinely beautiful chandelier still leaves a room feeling off.
The range exists for two competing reasons. Below 30 inches, the fixture starts blocking sightlines across the table and conversation has to route around it. Above 36 inches, seated guests look directly at the light source, the table loses its pool of light, and the fixture floats free of the furniture it is meant to belong to.
Measure from the tabletop, not from the floor and not from the ceiling. This sounds obvious and it is the step people skip. Take a tape from the table surface straight up to where the lowest point of the fixture will sit, including any dropped finial or glass.
Visual weight shifts the answer within the range. A heavy, detailed fixture wants the upper end, closer to 36 inches, so it has room to breathe. A light, open frame design can sit at 30 to 32 inches and feel intimate rather than crowded.
The same logic applies to table size. Larger tables benefit from the upper end of the range because the light has to reach further across the surface. A small round table can take the lower end without anyone ducking.
Adjusting for your actual ceiling height
The 30 to 36 inch rule assumes an eight foot ceiling, which most homes built after 1990 do not have. Add roughly three inches of clearance for every additional foot of ceiling height above eight feet, and the fixture stays proportional to the room instead of hanging low in a tall space.
A nine foot ceiling lands at 33 to 39 inches above the tabletop. Ten feet lands at 36 to 42 inches. Twelve feet lands at 42 to 48 inches. Beyond that, the calculation stops being the governing factor and total fixture height starts to matter more, because a small chandelier hung very high simply reads as lost.
Where the rule and the room disagree, let the room win. Tall chairs, a wide shade, a low beam or a busy traffic route around one end of the table are all legitimate reasons to sit outside the range. The measurements are a starting position, not a building code.
Vaulted and sloped ceilings need a sloped ceiling adapter and a fresh eye. Measure the height at the point directly above the table rather than at the peak, because that is the dimension the fixture actually hangs into.
|
Ceiling height
|
Tabletop to fixture bottom
|
Note
|
|
8 ft
|
30 to 36 in
|
The baseline. Use the lower end for light, open frames
|
|
9 ft
|
33 to 39 in
|
Most common in homes built after 1990. Start at 36 in
|
|
10 ft
|
36 to 42 in
|
Consider a taller fixture rather than only raising it
|
|
11 ft
|
39 to 45 in
|
Total fixture height starts to matter more than clearance
|
|
12 ft
|
42 to 48 in
|
A multi tier or vertically extended fixture usually suits better
|
|
Vaulted or sloped
|
Measure above the table
|
Needs a sloped ceiling adapter; measure at the table, not the peak
|
The two sizing formulas, and which one to trust
There are two widely used sizing formulas and they frequently disagree. In a dining room, size the fixture to the table: one half to two thirds the width of the table is the rule that produces a correct result almost every time.
A 42 inch wide table takes a fixture of roughly 21 to 28 inches in diameter. A 48 inch round table takes 24 to 32 inches. A 60 inch round table takes 30 to 40 inches. Round down when the room is tight and up when the ceiling is tall.
The second formula sizes to the room: add the room length and width in feet, and read the total as inches of fixture diameter. A twelve by fourteen foot dining room gives 26 inches. This one is useful when there is no table yet, when the table is unusually small for the room, or when the fixture also has to hold its own in an open plan space.
When the two answers diverge, the table formula wins in a dedicated dining room and the room formula wins in an open plan space where the fixture is read from across a larger area. If the numbers land far apart, that usually means the table and the room are mismatched, which is worth knowing before you buy a light.
Leave at least six inches between the outer edge of the fixture and the edge of the table on every side, so nobody reaching across meets glass. The chandelier sizing guide works through the full formula including height calculations, and is the better reference if you are sizing for several rooms at once.
Matching the fixture shape to the table shape
Match the footprint of the fixture to the footprint of the table. A round or square table takes a round fixture. A long rectangular or oval table usually wants a linear fixture or a row of matched pendants, because a single round chandelier over a long table lights the middle and abandons both ends.
The threshold is roughly 72 inches of table length. Below it, one well sized round fixture generally works. Above it, a linear fixture running parallel to the table or two matched pendants spaced evenly along it will light the surface far better.
With two pendants, divide the table into thirds and place a fixture at each of the two dividing points. With three, divide into quarters. Keep them on the same circuit and the same dimmer so they behave as one fixture rather than three.
Orientation is the mistake people make with linear fixtures. The long axis of the fixture runs parallel to the long axis of the table, always. A linear fixture set across a table looks like an installation error even when it is deliberate.
For a long table, the multi light stem hung pendant range includes two, three and four light linear configurations built for exactly this. For a round table, the chandelier collection is the right starting point.
Centring the fixture over the table rather than the room
Centre the chandelier over the table, not over the room. When the existing junction box and the table centre do not align, the table wins, because a fixture that is visibly off centre relative to the table is obvious at every meal, while one that is off centre relative to the room is barely noticed.
This comes up constantly in open plan homes, where the electrical box was placed before anyone knew where the table would sit. There are three honest fixes: move the box, use a swag hook and cord to shift the fixture across, or move the table.
Moving the box is the clean answer and the most expensive. A swag works and looks intentional when the cord is treated as part of the design rather than hidden badly, which is easier with a fabric cord in a considered colour.
In an open plan room, check the alignment from the sightlines that matter: the kitchen island, the main walkway and the seating area. A fixture centred on the table can still look misaligned if it fights a strong architectural line, and in those cases a small compromise between the two centres reads better than a purist one.
Take the decision before you buy. A fixture chosen for a position it cannot occupy is a returns problem dressed up as a design problem.
Choosing a style that still works in five years
The dining room fixture is the one people keep longest, so choose for the architecture of the room rather than the current contents of it. Furniture turns over. A ceiling fixture rarely does.
Four broad directions cover most dining rooms. A clean geometric fixture suits contemporary and transitional rooms and ages well because it is not committing to a decorative language. A shaded or domed fixture reads warmer and throws more light downward onto the table. A linear multi light configuration suits long tables and open plan rooms. A schoolhouse or RLM derived shape carries an industrial heritage that sits comfortably in farmhouse, craftsman and warehouse conversions.
Scale the drama to the room, not the budget. In a small dining room, one strong fixture with restraint elsewhere beats an ornate one. In a large one, a single oversized piece is more confident than a matched set of smaller fixtures, and current design practice has moved firmly toward one character rich fixture over a row of identical ones.
Finish sets the tone more than shape does. Architectural bronze and matte black are the durable anchors, while warm metals such as brushed brass have been widely specified through 2026. Polished chrome has fallen out of favour.
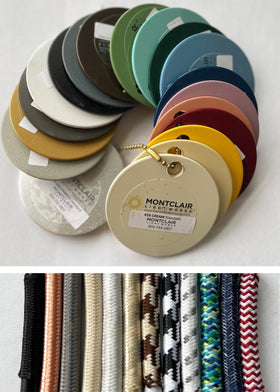
Colour over a dining table is the genuine shift of the last two years. Deeper blues, muted greens and rich reds are being used deliberately rather than as novelty, and a coloured fixture is the least expensive way to give a neutral dining room a point of view. The brand’s round up of 2026 lighting trends covers where finishes are heading in more detail.
Light quality: what to specify beyond the fixture
Specify between 2700K and 3000K for a dining room and put the fixture on a dimmer. Anything cooler than 3000K over a table makes food look grey and skin look tired, which is a strange outcome to accept from a fixture chosen for its looks.
Colour rendering index is the spec nobody reads and everybody notices. At CRI 90 or above, food, wine and skin tones render accurately. Below CRI 80 the shift is visible at the table even to people who could not name what changed.
Total output matters less than you would think, because a dining room is not a task space. A dimmed fixture at forty percent output with warm light does more for the room than a bright one at full power. What matters is having the range available.
Confirm that the lamp, the driver and the wall dimmer are compatible before installation. A mismatch produces flicker and audible buzz, both of which are far more noticeable in a quiet dining room than in a kitchen.
The medium base versus integrated LED decision is worth taking deliberately in a dining room, because this is a fixture you expect to keep. A medium base socket lets you change the lamp as technology moves; an integrated LED gives a slimmer profile but reaches end of life as a unit. The comparison of medium base and integrated LED sets out the trade without spin.
Layering: why one fixture is rarely enough
A dining room lit only from above works for one purpose. The same room with wall lighting on a second circuit works for a weeknight dinner, a long evening with friends and a table full of homework, which is what most dining rooms are actually asked to do.
Wall sconces are the natural second layer. Place them on the wall behind a sideboard or flanking a mirror, centred at 60 to 66 inches from the floor, which sits above seated eye level and adds warmth without glare during a meal.
Keep the layers on separate switches. The whole value of the second layer is being able to run it with the chandelier dimmed low, and a shared switch removes that option entirely.
A third layer helps in rooms with something worth lighting. A picture light over artwork or a lamp on a sideboard gives the room somewhere else for the eye to go when the table is empty.
Match finishes across layers without matching fixtures. Repeating a finish ties the room together; repeating the exact same fixture in three sizes reads as a showroom set. The wall sconce collection shares finishes with the ceiling ranges, which makes that coordination straightforward.
Low ceilings, high ceilings and awkward dining rooms
In a dining room with a ceiling below eight feet, drop the chandelier idea and use a flush or semi flush fixture instead. A hanging fixture in a low room either blocks sightlines or forces people to duck, and neither is worth the look.
Where the ceiling is only slightly low, a compact fixture with an upward or diffused shade keeps light off the tabletop plane and makes the ceiling read higher. A downward pooling fixture in a low room does the opposite.
Very tall and vaulted rooms have the opposite problem, which is a fixture that looks lost. The fix is a taller fixture rather than a lower one. Extending the drop on an undersized chandelier only makes it look further away and smaller.
Open plan dining areas need the fixture to work from several angles at once, including from the kitchen and the seating area. Fixtures that look good from below and dull from the side are a common disappointment in these rooms, so check the product photography for a side elevation before ordering.
If a hanging fixture genuinely will not work, the flush mount range covers the low ceiling case properly, and a pair of them over a long table often looks more intentional than one fixture struggling in the middle.
The night test and the mistakes it catches
Choose a dining room fixture for how it behaves at night, because that is when the room is used. Almost every chandelier is chosen in daylight, on a screen, in a photograph shot with natural light flooding the room, and that is the one condition under which it will almost never be seen.
The most useful check takes five minutes. Once the fixture is installed and before anything is finalised, sit down at the table in the dark with only that fixture on. Look across the table at the person opposite. If you are looking at a lamp instead of a face, the fixture is too high or the shade is too open for the position.
The second check is the tabletop itself. Light should pool on the table and fall off toward the edges of the room. A fixture that lights the ceiling and leaves the table dim is doing the opposite of its job in a dining room, however good it looks switched off.
The third is glare from reflective surfaces. A glass tabletop, a polished finish or a large mirror will bounce an exposed lamp straight back at seated guests, which is a reason to favour a diffused or downward shade in those rooms.
Mock up before drilling wherever possible. Hanging a cardboard disc at the fixture diameter and the intended height for a day tells you more about scale and clearance than any calculation, and it costs nothing to be wrong at that stage.
A short specification checklist
Run these checks before ordering and the fixture that arrives will be the one the room needed.
- Measure ceiling height and tabletop height, then set the target clearance from the reference table above
- Size to one half to two thirds of table width in a dedicated dining room, or room length plus width in an open plan space
- Confirm at least six inches between the fixture edge and the table edge on every side
- Match fixture footprint to table footprint, and run linear fixtures parallel to the long axis
- Confirm the junction box aligns with the table centre, or plan the swag or box move now
- Specify 2700K to 3000K, CRI 90 or above, and confirm dimmer compatibility as one decision
- Check the fixture from a side elevation if the room is open plan
A dining room chandelier is a long term decision made under short term pressure, usually during a renovation with a dozen other choices competing for attention. The measurements settle most of it. Once the height, the diameter and the footprint are fixed, the remaining choice is style and finish, which is the enjoyable part. Start with the chandelier collection for round tables and the multi light pendant range for long ones, and if the colour is the part you are unsure about, a finish and cord sample set is a cheaper way to test it than a return.
4. FAQ
How high should a chandelier hang over a dining table?
Hang the bottom of a dining room chandelier 30 to 36 inches above the surface of the table on a standard eight foot ceiling. Below 30 inches the fixture starts blocking sightlines across the table; above 36 inches seated guests look directly at the light source and the table loses its pool of light. For higher ceilings, add roughly three inches of clearance for every additional foot above eight feet, so a nine foot ceiling lands at 33 to 39 inches and a ten foot ceiling at 36 to 42 inches. Measure from the tabletop to the lowest point of the fixture, including any dropped finial or glass, rather than from the floor or the ceiling.
What size chandelier do I need for my dining table?
Size the fixture to one half to two thirds the width of the table. A 42 inch wide table takes a fixture around 21 to 28 inches in diameter, a 48 inch round table takes 24 to 32 inches, and a 60 inch round table takes 30 to 40 inches. Round down when the room is tight and up when the ceiling is tall. The alternative formula, adding room length and width in feet and reading the total as inches of diameter, is more useful in an open plan space or when there is no table yet. Leave at least six inches between the fixture edge and the table edge on every side.
Should a dining room chandelier be centred over the table or the room?
Centre it over the table. When the existing junction box and the table centre do not align, the table wins, because a fixture that is visibly off centre relative to the table is obvious at every meal while one that is off centre relative to the room is barely noticed. This comes up constantly in open plan homes where the electrical box was placed before anyone knew where the table would sit. The three honest fixes are moving the box, using a swag hook and cord to shift the fixture across, or moving the table. Decide before you buy, since a fixture chosen for a position it cannot occupy becomes a return problem.
What kind of chandelier works best over a long rectangular table?
A linear fixture or a row of matched pendants generally beats a single round chandelier over a long rectangular table. The rough threshold is 72 inches of table length: below it, one well sized round fixture works; above it, a single round chandelier lights the middle and abandons both ends. Run the long axis of a linear fixture parallel to the long axis of the table, never across it. With two pendants, divide the table into thirds and place a fixture at each dividing point. With three, divide into quarters. Keep all the fixtures on the same circuit and the same dimmer so they behave as one.
Can you hang a chandelier in a dining room with low ceilings?
Below about eight feet, a flush or semi flush fixture is the better answer than a chandelier. A hanging fixture in a low room either blocks sightlines across the table or forces people to duck walking past, and neither trade is worth the look. Where the ceiling is only slightly low, a compact fixture with an upward or diffused shade keeps light off the tabletop plane and makes the ceiling read higher, while a tightly downward pooling fixture does the opposite. Over a long table in a low room, a pair of flush fixtures often looks more intentional than one fixture struggling alone in the middle.
What colour temperature is best for a dining room chandelier?
Specify between 2700K and 3000K and put the fixture on a dimmer. Anything cooler than 3000K over a dining table makes food look grey and skin look tired. Alongside colour temperature, look for a colour rendering index of 90 or above, which is the specification that determines whether food, wine and skin tones render accurately; below CRI 80 the shift is visible at the table even to people who cannot name what changed. Total output matters less than the ability to dim, since a dining room is not a task space and a warm fixture at forty percent output does more for the room than a bright one at full power.